They’re perfect for spreading Christmas cheer to your family and friends, without adding more overwhelm to your holiday to-do list.
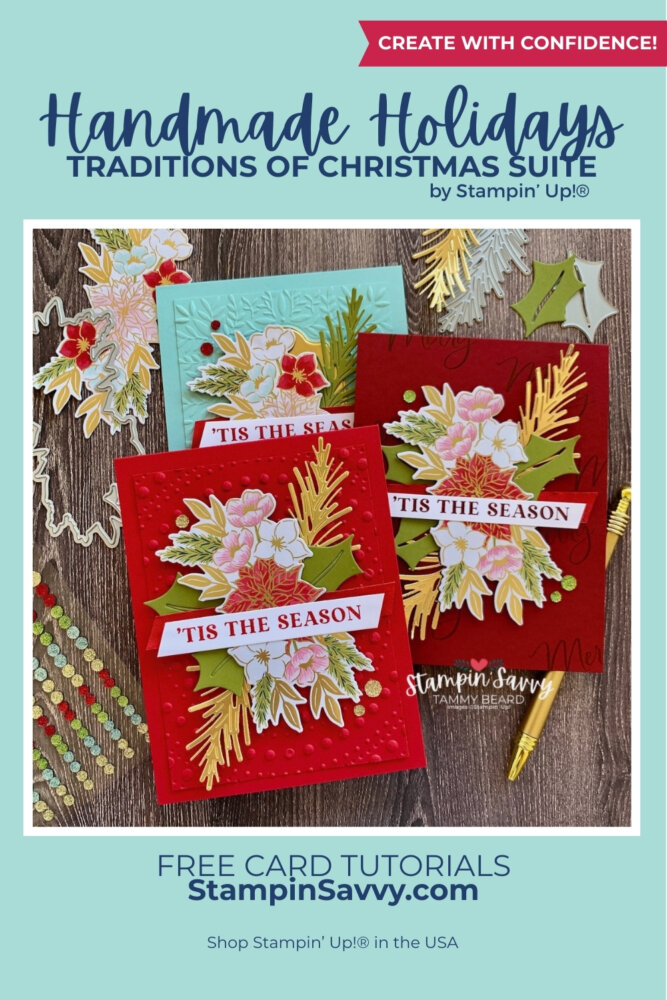
PHOTO 1: One design, three ideas!
In today’s post, we’re starting with a simple design that can be made in less than 30 minutes – with stunning results!
Order your suite favorites now and craft along with me throughout the month to create a stack of beautiful holiday cards ready to give by the end of October!
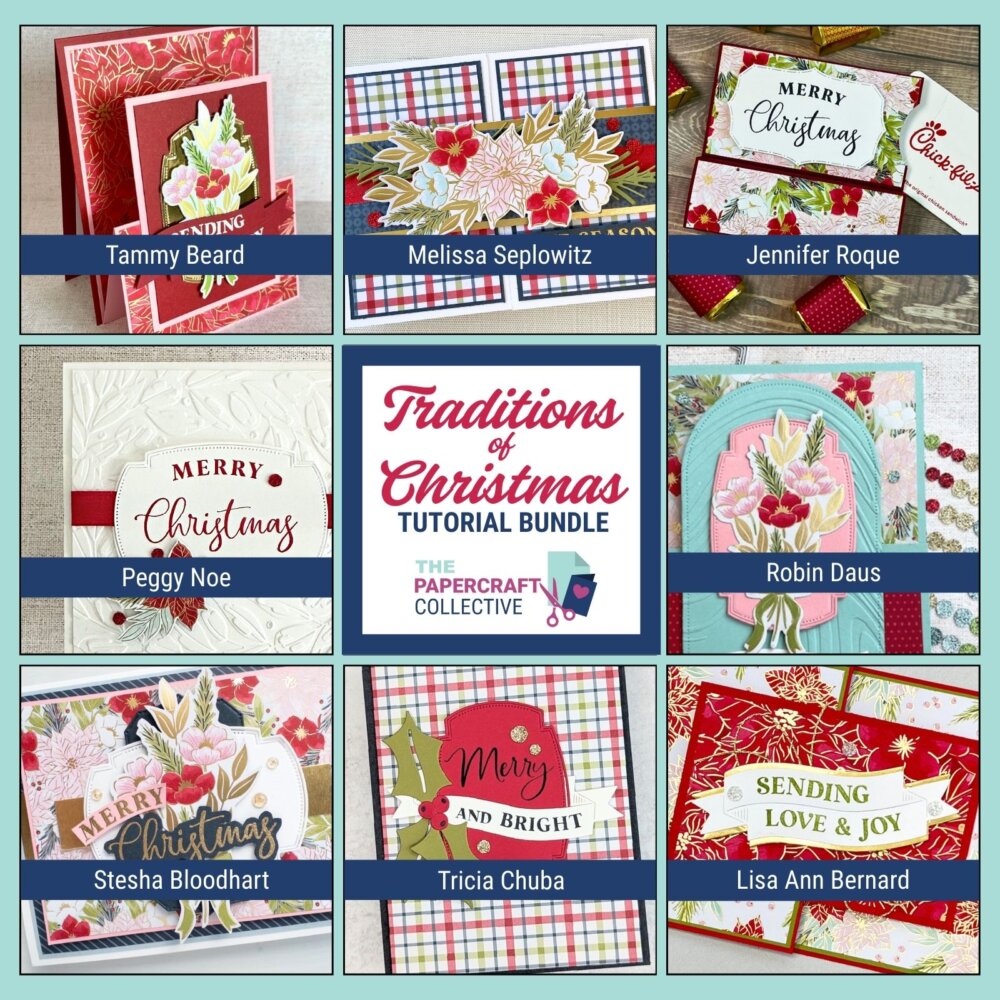
OCTOBER SAVVY SHOWCASE: Traditions of Christmas Suite
Get the entire suite collection of coordinating products or choose your favorites!
PHOTO 2:Traditions of Christmas Designer Paper with Christmas Greenery Dies
SAVVY DESIGNER PAPER TIPS
Die-cut 11 floral images from this 1 sheet of Traditions of Christmas Designer Paper (shown above- you get 2 sheets per package, enough for 22 cards!)
Savvy Tips…
Save some of these floral images for the cards coming in a couple weeks.
Don’t let the partial images along the edges go to waste… die-cut them, also! I’ll be sharing ideas on using them, too!
You can also die-cut the (separate) red flowers [see bottom of Photo 2 above] with the coordinating die from Christmas Greenery, however, the die only cuts the flower (not the leaves).
I chose to hand-cut these images with small scissors so the leaves were included… they’re quick & simple and not at all fussy!
Set these small flowers aside, we’ll be using them on next week’s cards!
CUT & PREP (Width x Length)
Cardstock for Card Base: 8-1/2″ x 5-1/2″
On Paper Trimmer, score on long side at 4-1/4″, burnish fold with Bone Folder.
Cardstock for Embossed Layer: 3-3/4″ x 5″
Place inside favoriteembossing folder and run through the Stampin’ Cut & Emboss Machine (or similar)
With large evergreen die from Christmas Greenery, cut two boughs (they only need to be about 2/3 the height of the die) on Stampin’ Cut & Emboss Machine (or similar)
Green Cardstock [shown-Old Olive]
With holly dies from Christmas Greenery, cut three leaves on Stampin’ Cut & Emboss Machine (or similar)
Traditions of Christmas Specialty Designer Series Paper (see Photo 2 above)
With coordinating open die from Christmas Greenery, cut (1) floral image.
Savvy Tip: Loosely cut the images apart with scissors before die-cutting, then die-cut all the images at one time. It goes very quickly and saves time later!
PHOTO 4: Close-Up of Layered Die-Cuts & Ribbon, before Sentiment
ASSEMBLY
Adhere the embossed cardstock layer, centered on card
SEE PHOTO 3. Adhere the gold foil evergreen boughs first, then holly leaves. Keep the die-cut floral piece (from the designer paper) handy to gauge where to place them.
SEE PHOTO 4. Add a 4-1/2″ piece of Real Red 1/2″ Shiny Ribbon centered behind the middle of the floral spray; add Stampin’ Dimensionals and add at an angle over die-cuts.
Adhere sentiment strip with Stampin’ Dimensionals on each end (glue in the center), adhere across the center. With sharp scissors, trim ribbon ends to match angle of sentiment strip.
PHOTO 5: Completed Card #1 made with Real Red Cardstock and Ink
These embellishments are FLAT for hassle-free mailing!
Includes three colors, matched to the Traditions of Christmas Designer Paper!
PHOTO 6: Alternative Card 2 made with Pool Party Cardstock. Embossed with Peaceful Greenery 3D Embossing Folder; includes gold foil die-cut from Peace On Earth Dies. Holly leaves omitted.PHOTO 7: Alternative Card 3 made with Cherry Cobbler Cardstock and Ink. Embossed layer was omitted and replaced with random stamping on card front [Traditional Labels Bundle].
Which design is your favorite? Be sure to leave a comment and share your thoughts!
Each week you’ll discover stress-free card ideas that are simple to make and beautiful to give… handmade holiday greetings you’ll be proud to share with the people you love most! ❤️
SHOP SUPPLIES TO MAKE CARD 1
Click any image to add items to your Stampin’ Up! shopping cart …happy crafting!
Hover over the graphic below and click the red Pinterest SAVE logo in the upper left corner to save this to your favorite Pinterest board! Enjoy quick & easy access to the tutorial whenever you want.
BEFORE YOU GO
Want more ideas for the Traditions of Christmas Suite?
Enjoy this post? Leave a comment below… I love to hear from you!
Thanks for shopping with me and supporting our small family business!
About Tammy Beard
Stampin' Up!® Independent Demonstrator who loves crafting handmade happiness with paper, stamps and ink!❤ SHOP Stampin' Up!® in the USA @ StampinSavvy.com/Shop
![Traditions Of Christmas Suite Collection (English) [ 165877 ]](https://i0.wp.com/assets1.tamsnetwork.com/images/EC042017NF/165877s.jpg?w=120&ssl=1 "Traditions Of Christmas Suite Collection (English) [ 165877 ]")


![Traditions Of Christmas 12" X 12" (30.5 X 30.5 Cm) Specialty Designer Series Paper [ 165853 ]](https://i0.wp.com/assets1.tamsnetwork.com/images/EC042017NF/165853s.jpg?w=120&ssl=1 "Traditions Of Christmas 12\" X 12\" (30.5 X 30.5 Cm) Specialty Designer Series Paper [ 165853 ]")
![Christmas Greenery Bundle [ 165873 ]](https://i0.wp.com/assets1.tamsnetwork.com/images/EC042017NF/165873s.jpg?w=120&ssl=1 "Christmas Greenery Bundle [ 165873 ]")
![Traditional Labels Bundle (English) [ 165865 ]](https://i0.wp.com/assets1.tamsnetwork.com/images/EC042017NF/165865s.jpg?w=120&ssl=1 "Traditional Labels Bundle (English) [ 165865 ]")
![Traditional Sparkling Sequins [ 165875 ]](https://i0.wp.com/assets1.tamsnetwork.com/images/EC042017NF/165875s.jpg?w=120&ssl=1 "Traditional Sparkling Sequins [ 165875 ]")
![Real Red 1/2" (1.3 Cm) Shiny Ribbon [ 165876 ]](https://i0.wp.com/assets1.tamsnetwork.com/images/EC042017NF/165876s.jpg?w=120&ssl=1 "Real Red 1/2\" (1.3 Cm) Shiny Ribbon [ 165876 ]")
![Dotted Circles 3 D Embossing Folder [ 163789 ]](https://i0.wp.com/assets1.tamsnetwork.com/images/EC042017NF/163789s.jpg?w=120&ssl=1 "Dotted Circles 3 D Embossing Folder [ 163789 ]")
![Gold Foil Sheets [ 132622 ]](https://i0.wp.com/assets1.tamsnetwork.com/images/EC042017NF/132622s.jpg?w=120&ssl=1 "Gold Foil Sheets [ 132622 ]")
![Old Olive 8-1/2" X 11" Cardstock [ 100702 ]](https://i0.wp.com/assets1.tamsnetwork.com/images/EC042017NF/100702s.jpg?w=120&ssl=1 "Old Olive 8-1/2\" X 11\" Cardstock [ 100702 ]")
![Real Red 8-1/2" X 11" Cardstock [ 102482 ]](https://i0.wp.com/assets1.tamsnetwork.com/images/EC042017NF/102482s.jpg?w=120&ssl=1 "Real Red 8-1/2\" X 11\" Cardstock [ 102482 ]")
![Real Red Classic Stampin' Pad [ 147084 ]](https://i0.wp.com/assets1.tamsnetwork.com/images/EC042017NF/147084s.jpg?w=120&ssl=1 "Real Red Classic Stampin' Pad [ 147084 ]")
![Basic White 8 1/2" X 11" Thick Cardstock [ 159229 ]](https://i0.wp.com/assets1.tamsnetwork.com/images/EC042017NF/159229s.jpg?w=120&ssl=1 "Basic White 8 1/2\" X 11\" Thick Cardstock [ 159229 ]")
![Basic White Medium Envelopes [ 159236 ]](https://i0.wp.com/assets1.tamsnetwork.com/images/EC042017NF/159236s.jpg?w=120&ssl=1 "Basic White Medium Envelopes [ 159236 ]")
![Paper Trimmer [ 152392 ]](https://i0.wp.com/assets1.tamsnetwork.com/images/EC042017NF/152392s.jpg?w=120&ssl=1 "Paper Trimmer [ 152392 ]")
![Stampin' Cut & Emboss Machine [ 149653 ]](https://i0.wp.com/assets1.tamsnetwork.com/images/EC042017NF/149653s.jpg?w=120&ssl=1 "Stampin' Cut & Emboss Machine [ 149653 ]")
![Multipurpose Liquid Glue [ 110755 ]](https://i0.wp.com/assets1.tamsnetwork.com/images/EC042017NF/110755s.jpg?w=120&ssl=1 "Multipurpose Liquid Glue [ 110755 ]")
![Mini Glue Dots [ 103683 ]](https://i0.wp.com/assets1.tamsnetwork.com/images/EC042017NF/103683s.jpg?w=120&ssl=1 "Mini Glue Dots [ 103683 ]")
![Mini Stampin' Dimensionals [ 144108 ]](https://i0.wp.com/assets1.tamsnetwork.com/images/EC042017NF/144108s.jpg?w=120&ssl=1 "Mini Stampin' Dimensionals [ 144108 ]")
Tammy, I love these gorgeous, quick cards. Thanks for sharing!